Table of Contents
Setting Up Your Apple Vision Pro: A Step-by-Step Guide
What’s included in your Apple Vision Pro package:
Wall with integrated display
A light seal
Two light sail cushions
A pair of audio straps
Two headbands: Solo Knit Band and Dual Loop Band
Battery with attached power cable
USB-C charging cable
USB-C power adapter
Apple Vision Pro Cover
Apple Vision Pro Polishing Cloth
Upon unboxing, you’ll find that your Apple Vision Pro already comes with a light cell, light cell cushion, audio strips, and Solo Knit band attached to the enclosure. Your next steps include charging the battery, connecting the power cable, and attaching the ZEISS optical inserts if necessary.”
Before you set up your Apple Vision Pro
“Make sure you’re in a safe, distraction-free environment. Familiarize yourself with the Safe Use Guidelines for your Apple Vision Pro.
Verify that you have a strong Wi-Fi connection, as the Apple Vision Pro cannot be set up with a captive Wi-Fi network.
Discover the perfect fit for your Apple Vision Pro, including instructions for adjusting the headband, wearing and removing the device, and protecting it when not in use.”
Set up your Apple Vision Pro
“Power up your Apple Vision Pro’s battery by charging it with the supplied power adapter and USB-C charging cable. When connecting the power cable to your Apple Vision Pro Audio Strap, make sure the cable is slightly Inserted at an upward angle. Dot on power cable with white outline dot on audio strap.”

Rotate the power cable clockwise until it locks in.

“Once the battery light on the power cable flashes, indicating a successful connection, your Apple Vision Pro is turned on. Proceed by removing the front cover of the device.
If you have ZEISS optical inserts for prescription or reader needs, attach them here. When you hear a tone on the power cable or see a solid battery light, your Apple Vision Pro is ready for use.
Ensure a proper fit when putting on your Apple Vision Pro. Follow the on-screen instructions to set up visionOS. When the device is turned on and the battery is connected, it will enter sleep mode when removed and wake up when reinserted.
How to get the best fit wearing Apple Vision Pro
Discover the correct way to don and remove your Apple Vision Pro, ensure proper placement and get the best fit.
How to put on Apple Vision Pro
Your Apple Vision Pro includes two headbands: the Solo Knit Band and the Dual Loop Band. The Vision Pro comes with a pre-attached Solo Knit band. If you prefer to use a dual loop band, simply detach the solo knit band and replace it with a dual loop band.
Put on Apple Vision Pro with the Solo Knit Band
“Attaching the Apple Vision Pro with the Solo Knit Band involves holding the device by the frame with one hand while holding the Solo Knit Band with the other. Avoid lifting the Vision Pro using lights, audio strips, or power cables. do
Bring the device close to your face and slide the Solo Knit band over the back of your head. For certain hairstyles, it may be easier to place the headband before lowering the device over your eyes.
Once the device is on, adjust the Solo Knit band by turning the foot dial clockwise to tighten and counter-clockwise to loosen. The Apple Vision Pro should feel secure but not too tight.
If the headband is too tight, it can cause skin sensitivity, discomfort, or marks on your face. Some temporary, mild symptoms are normal after regular use.
If the headband is too loose or in the wrong position, you may receive a message indicating that the device is too high or too low. Make necessary adjustments.
To reduce the risk of injury, remove facial jewelry such as nose rings or eyebrow rings before donning the Apple Vision Pro, and avoid using the device if you have an injury to your nose, face, or head. Avoid.”
Put on Apple Vision Pro with the Dual Loop Band
How to take off Apple Vision Pro
Before removing the headband, make sure it is loose. For a solo knit band, turn the foot dial counterclockwise. In the case of a dual-loop band, loosen the tab on the lower strap by pulling it away from your head.
When removing the device, always hold the frame — avoid grabbing the light cell, headband, audio straps, or power cable.
When laying down your device, take care to prevent the cover glass from contacting hard surfaces such as tables or countertops. Store the battery close to the Vision Pro when not in use to prevent the power cable from becoming entangled with other items.
After use, remember to put the cover back on the Vision Pro.
How to remove or attach your head band
Your Apple Vision Pro includes two headbands: the Solo Knit Band and the Dual Loop Band.
Solo Knit Band:
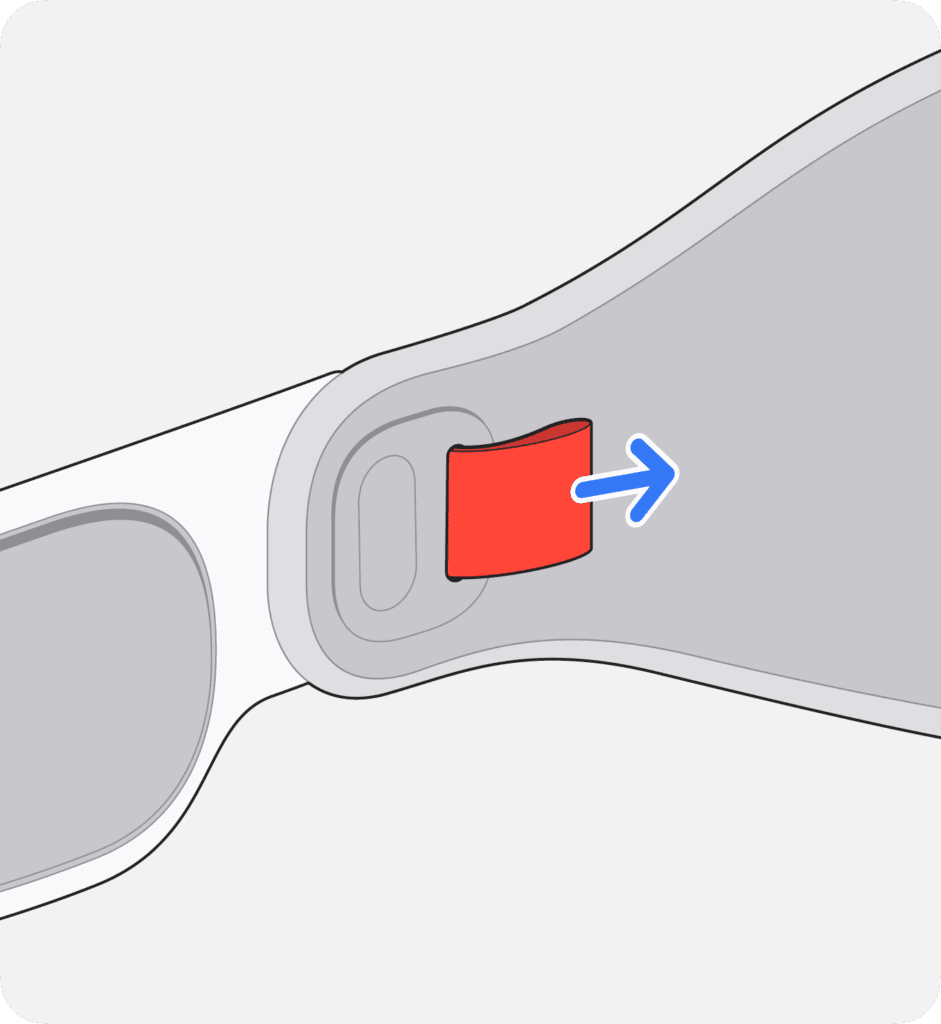
To detach the Solo Knit Band from the Apple Vision Pro, pull the orange tabs on the inside of both sides of the headband. When reattaching the Solo Knit band, align it with the foot dial on the right and the size indicator inside the Solo Knit band on the left. Make sure each side snaps securely into place — hear or feel a snap indicating a successful attachment.
Dual Loop Band:
To remove the Dual Loop band from the Apple Vision Pro, pull the orange tabs on the inside of both sides of the band. When reattaching the dual loop band, align it with the size indicator inside the left side dual loop band. Confirm that each side snaps securely into place—listen or feel for a snap, indicating proper attachment.
How to adjust Apple Vision Pro for a precise fit
When wearing the Apple Vision Pro, it’s important to feel balanced support on your cheeks and forehead. The device should be snug but not too tight.
Adjusting the Solo Knit Band:
If the headband feels too tight, turn the fit dial counterclockwise and gently pull the frame of the device away from your face.
For the best fit with even support between your forehead and cheeks, follow these guidelines:
– To reduce the pressure on your forehead, pull the Solo Knit Band up slightly on the back of your head.
– To reduce pressure on your cheeks, pull the solo knit band down slightly on the back of your head.
– If you have pressure on the bridge of your nose, consider using the light-cell cushion with the “+” symbol from your box packaging or try switching to a dual-loop band.
– To adjust the tightness of the Solo Knit band, turn the foot dial clockwise to tighten or clockwise to loosen.
Make sure your hair doesn’t get caught in the headband or power cable if you feel any tugging.
If your eyelids touch the Vision Pro or you receive a notification that your eyes are too close to the display, consider using the LightCell Cushion marked with a “+” from your box packaging. If the problem persists, you may need a different size light cell.
If you get a notification that your eyes are too far away from the display, try switching to the thin light cell cushion included with your Vision Pro. If the problem persists, you may need a different size light cell.
Adjust the Dual Loop Band
Use gestures with Apple Vision Pro
Discover the best way to enhance your experience using hand gestures to interact with visionOS.
Tips for the best experience
Consider the following tips for optimal gesture interaction with Apple Vision Pro:
1. The outward-facing cameras on the Apple Vision Pro track hand gestures. Make sure you are in a well-lit environment and keep the device clean and free of smudges.
2. Keeping your arm up is unnecessary when interacting with Apple Vision Pro. Most gestures can be performed with your hands resting on your desk or in your lap.
3. Make sure your hands are visible to the Apple Vision Pro, avoid placing them under a desk or blanket.
4. Items such as gloves, long sleeves, or large jewelry that cover an important part of your hand or all of your hands can affect the tracking of gestures. If you experience problems, consider removing these items.
5. Avoid crossing your arms or hiding the pointing hand with another hand.
Tap your fingers together
To select an item in Apple Vision Pro, look at an element and tap your thumb and index finger together.
Tapping your thumb and index finger together is similar to tapping an object on your iPhone or clicking an object on your Mac — to select an app, open a link in Safari, select and view notifications. Use this tip.
Pinch and drag
To reposition items within Apple Vision Pro, focus on the item and pinch your thumb and index finger together. Hold the pinch position as you move the item to the desired location, then release. give
Use pinch-and-drag gestures for tasks like organizing apps through the window bar, adjusting the size of a shape in Freeform, or transferring an image from Photos to iMessage. This gesture is also useful for slow and accurate scrolling through content.
Pinch and flick your wrist
For quick movement or fast scrolling through content in Apple Vision Pro, start the gesture by pinching your thumb and index finger together, then flick your wrist up or down. Release in a smooth motion.
Use this gesture to navigate horizontally through your apps in Home View, scroll efficiently through long web pages, or browse through photos.
Pinch to see more options
Pinch and hold an item in Apple Vision Pro to reveal additional options. Focus on the item, tap your thumb and index finger together, and maintain contact. After additional options appear, pinch Release , and then tap to select the desired option
This gesture is useful for showing link previews in Safari, hiding other apps by pinching and holding an app’s nearby button, and various other functions.
Connect and charge Apple Vision Pro battery
Discover how to connect and charge your Apple Vision Pro battery for the best experience.
Apple Vision Pro is powered by an external rechargeable battery, which provides up to 2 hours of normal use or 2.5 hours of video viewing* on a full charge. When connected to power, the battery keeps Apple Vision Pro going all day, syncing mail, photos and more even when not in use.
Apple Vision Pro automatically turns off if left unused for 24 hours. To verify its status when not worn, pick up the device – if powered on, the power cable light illuminates briefly. In case of shutdown, press and hold the top button for three seconds to restart. After about a minute, the Apple Vision Pro emits a tone, indicating readiness, with the Power Cable light solid.
For prolonged periods of non-use, it is recommended to disconnect the battery.
How to connect the Apple Vision Pro battery
Insert the power cable into the power connector on the left audio strip, angling it slightly upward to align the dot on the cable with the outlined white dot on the audio strip.
Rotate the power cable a quarter turn clockwise, making sure the dot on the cable lines up with the dot on the audio strap. On successful connection, the power cable lights up, powering on the Apple Vision Pro. About a minute later, a tone signals readiness, and the power cable light goes solid.
How to disconnect the Apple Vision Pro battery
To disconnect the battery from your Apple Vision Pro, save any open documents as disconnecting the battery shuts down the device. Then, twist the power cable counterclockwise until it disengages. Be it.
Charging the Apple Vision Pro battery
To recharge the Apple Vision Pro battery, link it to a power outlet using a USB-C charge cable and an Apple USB-C power adapter with a rating of 30W or higher. When plugged into the battery, the light next to the USB-C port on the battery lights up briefly, indicating a successful connection to power.
What the battery’s light tells you about its charge level
See the battery level in visionOS
If your Apple Vision Pro battery isn't charging
If your Apple Vision Pro light does not turn on when connected to battery power, start by verifying you are using a USB-C power adapter rated for 30W or more. Identify an alternate power adapter or Experiment with USB-C charging cables. Possible issues. Also, verify if the wall plug or other power source you’re connected to can successfully power other devices.
Keep these battery tips in mind
If you suspect that there may be liquid in the charging port of the Apple Vision Pro battery, do not plug the charging cable into it. For liquid exposure, and other information about using and charging the battery safely, see Important safety information for Apple Vision Pro.
If your Apple Vision Pro is turned on and you don’t use it for 24 hours, the device automatically turns off. If Apple Vision Pro is turned off, press and hold the top button for three seconds to turn it back on.
While wearing Apple Vision Pro, keep the battery in a comfortable place close to your body, such as in your pocket.
Avoid placing the battery near external heat sources.
Be aware of the battery and power cable when using Apple Vision Pro. For example, don’t sit with the battery in your back pocket, remove the battery from your desk while standing, or let it fall between the seats on an airplane.
Remove the Apple Vision Pro if the battery is accidentally detached during use.
It is normal for the battery to heat up as it charges. To help reduce battery temperature and extend battery life, remove it from your pocket or other enclosed space while charging.
* Testing by Apple in November 2023 using pre-production Apple Vision Pro units and software. Testing consists of full battery discharge while performing each of the following tasks: video playback, Internet browsing, local video capture, and FaceTime.Video playback was tested in conjunction with the environment using 2D movie content purchased from the Apple TV app. Internet browsing was tested using 20 popular websites. FaceTime enabled Personas between the two Apple Vision Pro units tested. Tested with network-attached Wi‑Fi. Battery life depends on device settings, usage, network, environmental conditions, and many other factors. Battery tests are performed using specific Apple Vision Pro units. Actual results may vary.
clean and care for the device
How to clean Apple Vision Pro and accessories
Discover the proper way to clean the various components of your Apple Vision Pro, including the cover glass, light cell cushion, and more.
Is it safe to use disinfectants on the Apple Vision Pro?
No, avoid using isopropyl alcohol, Windex, Clorox, or similar products on hard, non-porous surfaces of the Apple Vision Pro. Clean your Vision Pro with a dry cloth, a slightly damp cloth, or follow the specific instructions below.
Be sure to clean your Apple Vision Pro polishing cloth and store it in a clean bag. Bags, handbags, pockets and other places can contain particles that could potentially scratch your device.
How to clean your Apple Vision Pro cover glass
How to clean your Apple Vision Pro displays
How to clean your ZEISS Optical Inserts
How to clean your Light Seal Cushion, head bands, and Apple Vision Pro Cover
How to clean your Light Seal
How to clean your Apple Vision Pro Curtain
How to clean your Audio Strap
How to clean your Apple Vision Pro Battery
How to clean your Apple Vision Pro Power Cable
How to clean your Apple Vision Pro Polishing Cloth
Attact and remove the head band
How to remove or attach your Apple Vision Pro head band
If you need to detach, attach, reattach or switch headbands on your Apple Vision Pro, familiarize yourself with the necessary steps.
About Apple Vision Pro head bands
How to remove or attach your Solo Knit Band
To reattach the Solo Knit band, align it with the foot dial on the right side and align the size indicator on the inside of the Solo Knit band with the left side. Make sure each side snaps securely into place. Go – a noticeable snap or click should confirm proper attachment.
How to remove or attach your Dual Loop Band
Apple Vision Pro User Guide

introduction to Apple vision pro
Apple Vision Pro serves as a spatial computer, seamlessly integrating digital content and applications into your physical environment, allowing navigation through eye movement, hand gestures, and voice commands.
Fist things fist
Learn how to get started with your Apple Vision Pro and navigate visionOS.


Watch, listen, and play
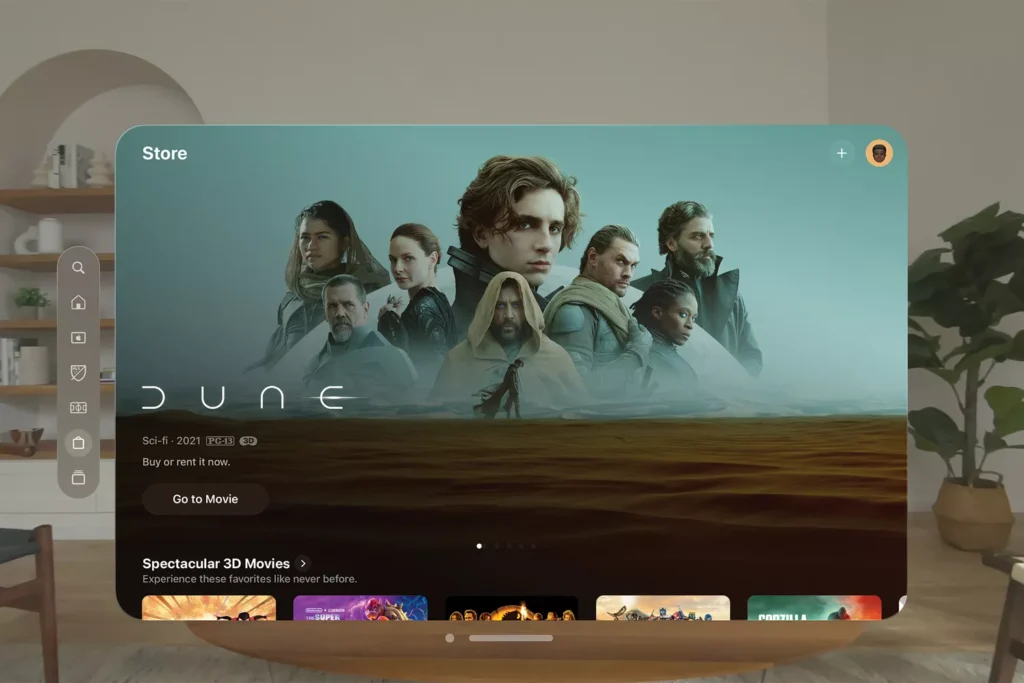
Watch your favorite shows and movies in the Cinema Environment in the Apple TV app, play your favorite games from the App Store and Apple Arcade, and even come face-to-face with dinosaurs in a new interactive experience.

Keep in touch
Discover innovative ways to capture and share memories with others. Engage in FaceTime calls that provide an immersive in-room experience, share local photos and videos, and give others in the room a Enables you to view your view on a separate screen.
Get work done
With Apple Vision Pro, create your ideal workspace. Seamlessly open visionOS apps with your Mac virtual display, engage with 3D objects in your documents, discover innovative ways to practice your upcoming presentations Do, and more.

Overview Apple vision pro
I experienced two test drives with the tech giant’s newly launched $3,499 futuristic ‘local computing’ headset, and my mind was truly blown.
For the past seven months, I’ve had a bit of an obsession with the pixelated virtual butterfly, which began during a visit to Apple’s Cupertino headquarters last June. I was invited to test the new Vision Pro. was, a wearable headset that seamlessly integrates into the physical world with a visually stunning digital universe displayed on two postage stamp-sized screens with a resolution greater than 4K TV. Is.The Vision Pro marks Apple’s initial venture into what CEO Tim Cook terms ‘native computing’, which aims to revolutionize how we engage in everyday productive tasks, communicate and experience movies, games and memories in a completely innovative way.

It’s pretty much a nail-biter to describe my experience with this device—but it still comes up woefully short.
The Vision Pro looks like a pair of old-school ski goggles, weighs a pound and a half, and contains 23 sensors, including a dozen cameras and six microphones that capture eye movements, hand gestures and sound. Track while also sensing objects. located around you.
According to Apple, images are displayed eight times faster than the human eye can blink. The strap that holds the device over your head has an array of speakers that deliver sound (what they call spatial audio) that matches whatever you’re listening to with the sounds of that virtual environment. In which you are immersed.
To be honest, I didn’t have high expectations when I first tried the Vision Pro. Over the years, I’ve tested a few other headsets, and each time, I felt nauseous, with a headache, and generally unimpressed. If this was the future of computing, I wasn’t sold.
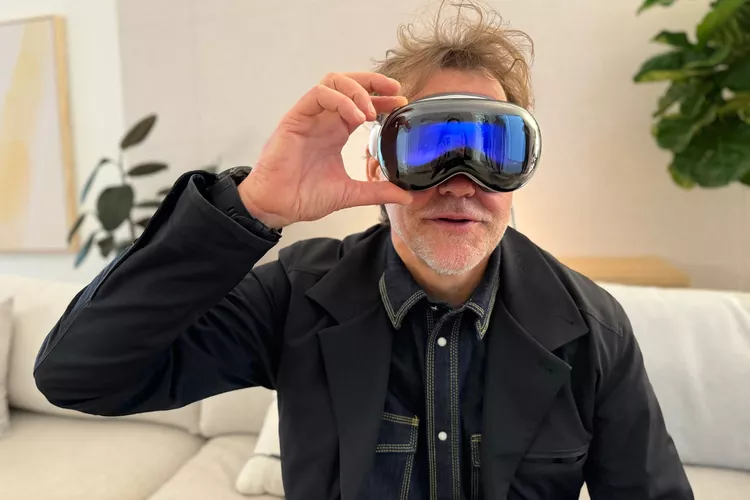
However, the moment I put on Apple’s new device and looked at its two tiny 23-million-pixel displays, I struggled to keep my jaw from dropping, exclaiming, ‘Oh wow!… Wow!.. .Ohhh!’ ..no way!’ I was well aware that the images before my eyes were not real, but after a few seconds, I didn’t care. I found myself getting a much more realistic experience interacting with files, words, and images on my MacBook Air than anything I was looking at.

During my initial experience with the Vision Pro, which involved Apple recreating my prescription lenses for the device, I held the glasses securely to my face, making sure that no light would shine through. And then press the digital crown button on the top right. Unit Vision Pro came to life quickly.
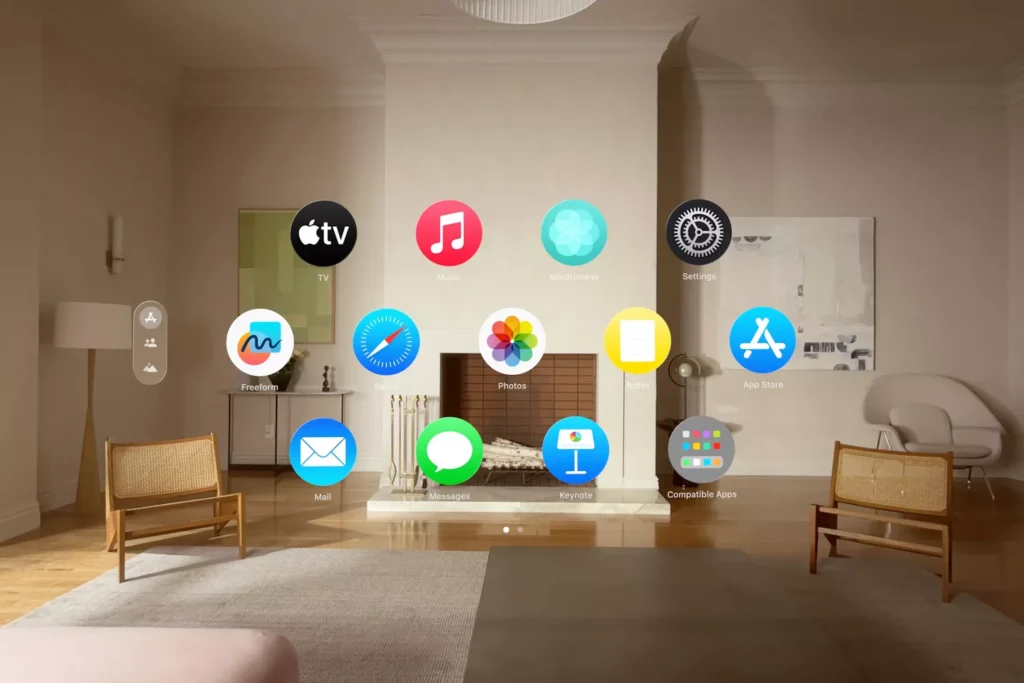
Within seconds, a grid of circular app icons floated in the middle of the room. (Apple claims more than a million apps can work with the device, and more than 600 apps are designed specifically for Apple’s Vision OS.)
To select a specific app, I just looked at it, pinched my thumb and index finger together, and it opened. Holding my pinched fingers together and moving them up or down allowed me to scroll through the contents. Navigating with my eyes, hands and voice was incredibly intuitive.
Given that a significant portion of my waking hours are spent typing on my keyboard for work, I was eager to experience what it would be like to use the Vision Pro. Creating a document—enlarging it to the size of a Mini Cooper and rolling it around the room with your hands—had a certain Minority Report feel to it. Staring at the foot-high words typed on the virtual keyboard (you can even connect a Bluetooth keyboard) was extremely satisfying.
Turning the Digital Crown, the room I was sitting in dissolved. Suddenly, I was standing by a pristine alpine lake near the base of Oregon’s Mount Hood. Bugs buzzed around me as a light rain splashed on the surface of the lake. Looking around, I could see the clouds drifting across the blue sky, and my feet were firmly planted in the soil. Behind me were tall fig trees .
Video calling on the device was even more real with FaceTime. The Vision Pro cameras created a virtual 3-D doppelgänger of me — called a Persona — that was shown to the Apple representative I was chatting with on another part of campus.
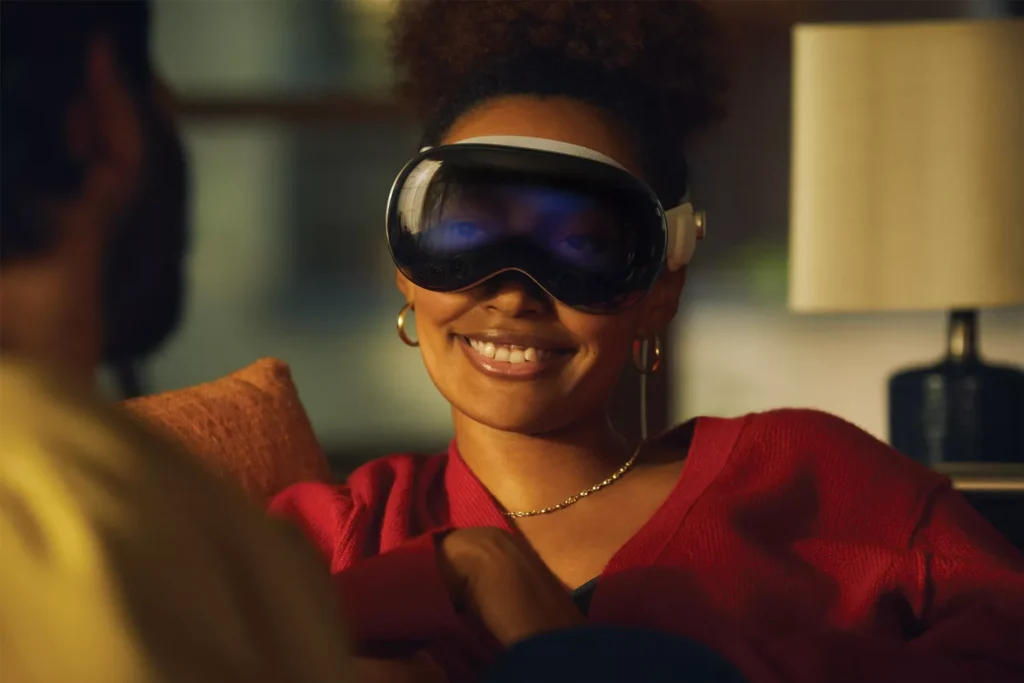
Considering using a headset in a room with others? To prevent users from isolating themselves from those around them, the device projects a digital representation of your eyes in front of the glasses, letting bystanders know when you’re looking at them (vs. browsing the web).
You can also create your own 3-D movies, called “native videos,” by activating the camera using a button on the left side of the headset. These videos are unlike anything I’ve ever seen before, and after a few seconds, I was almost convinced I’d been teleported to the exact moment the scene was captured.
Even more terrifying? Watching videos on the big screen projected in front of me. At some point, I found myself immersed in the Encounter Dinosaurs app, standing in a lava field as a giant dino rolled in front of me. In no time, it appeared to leap out of the confines of the screen towards me as the ground beneath my feet began to shake. My brain and gut told me it was all fake, but it was still a little disturbing.
Then I saw the virtual butterfly. It fluttered far and wide, seemingly oblivious to the larger creatures around. In no time, I extended my hand, and to my surprise, it fell gracefully onto my finger. when it happened. The moment her delicate six legs touched my finger, I could literally feel it on my skin. The experience was incredibly disturbing, and in the months that followed, I found myself questioning whether I had imagined the entire event.
Three weeks ago, I received another invitation to spend more time with the Vision Pro at Apple’s L.A. headquarters and all I could think of was the adorable butterfly. After thoroughly testing the device, exploring the latest enhancements and new content, I asked if I could have one last visit with their virtual winged insect. And just like before, I could feel it when it landed on my finger.

And that’s when it dawned on me—I was, of course, experiencing a vivid imagination. The Vision Pro’s ability to recreate the nuances of the physical world, or meatspace, is truly remarkable. It presents an astonishingly realistic artificial environment, and my brain, in its usual manner, seamlessly filled in the gaps.
What my brain cannot predict is the trajectory that Vision Pro and its underlying technology will chart for us—but I’m more than eager to embrace the journey. Meanwhile, I’ll be outside, with my index finger extended, on the lookout for virtual butterflies.
Apple vision pro prices
PRICE IN USA $3499
PRICE IN INDIA RS 2.8 LAKH
PRICE IN PAKISTAN PKR 978495.35
PRICE IN DUBAI DH 15000
PRICE IN UNITED KINGDOM EURO 2800
READ MORE
Apple iPhone 14 Pro max